In every blog offering side hustle ideas, in between the “play solitaire games for cash!” and “sell your data to big corporations for five bucks with this quick survey!” is always the suggestion to start your own blog. It seems like such a simple task- all you have to do is sign up to a platform and start writing, right? Right?
Well, it turns out that, much like those other “easy” suggestions, blogging is a bit more complex than it appears. That’s why I’m starting this “How to Blog” Series, where I’ll share the step-by-step process I followed to set up, design, and write this blog, all with complete transparency. So let’s dive in!
This post may contain affiliate links, which you can use to support my blog at no additional cost to you!
As promised, today we are going to look into the process for setting up our blogs. You’ve probably seen countless guides on Pinterest that claim you can get a fully functioning blog set up in half an hour, but that’s not quite right. The whole process took me about 4-5 hours—though, to be fair, I did spend a lot of time researching the best options. Hopefully this article can help you cut down on some of that.
Task 1: Pick a Blogging Service
Self-hosted
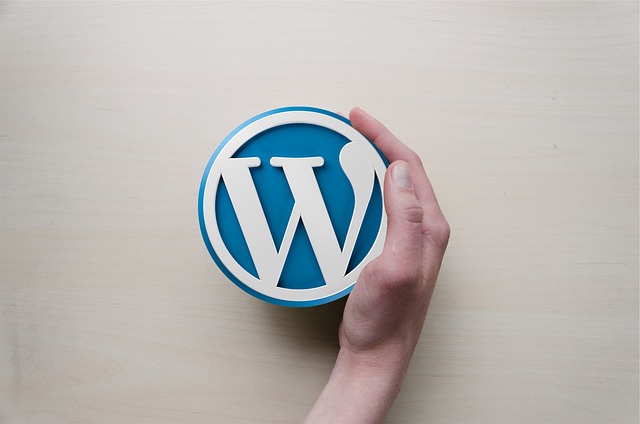
You can pick any blogging service that appeals to you. I went with https://wordpress.org/. Note the .org—there’s a wordpress.com, which is unrelated. I made the mistake several times of signing up for and logging into wordpress.com instead of wordpress.org… I don’t know why they named them like that.
WordPress is the most recommended service, and over 50% of websites use it. It’s also free (yay!). (Side note: can you believe I read a blog the other day that said: “You shouldn’t use WordPress because it’s free, so people will think your website is cheap.”? Please… That’s not how that works. You can’t even tell I made my website with wordpress unless I explicitly state it.).
The benefits of WordPress.ORG are that it’s beginner-friendly-ish (it has more of a learning curve than other platforms, but it’s not too bad) and gives you total control over your website without the limitations of other services. I haven’t experienced any cons so far, though I should mention you still have to pay for a domain and hosting service. Also, if you want any fancy plugins or themes, you might have to pay for those, too. But so far, I’ve found plenty of free options that work just fine.
Hosted
There are other options like Squarespace or Medium, which are admittedly much easier and quicker to set up. You don’t have to worry about domains, hosting services, or designing a website- the basic premise is you set up an account and start writing. Unfortunately, this comes at the cost of having limited everything (control, monetization, brand distinction, etc).
I decided to try Medium just for fun since it was easy to create a free account and they have an existing audience base which I would like to take advantage of. Since I’m writing blog posts for this website I can just copy those articles into Medium and eventually I’ll be able to compare which gets better traffic and makes more money. Note that you can only make money on Medium if you pay money (it’s five dollars a month). I would recommend waiting to get some traffic and following before becoming a member.
Task 2: Register your blog domain
This is technically the first step if you’re using WordPress, since it’s self-hosted (i.e. you need to provide the domain and the hosting service). I bought my domain through Porkbun because it was the cheapest—$6.99 for the first year, $11 annually after that. The next best price I found was around $11 for the first year. Your domain name contain your blog name (which we already came up with in the last blog post). Easy!
Oh there is one other thing you should do after buying your domain. There’s this thing called DNS, which stands for something I don’t remember. But what it does is if someone types in your domain, like www.cinnamonrollsinthedough.com, it translates it to computer language (i.e some numbers which represent your “address” on the internet). Then the computer can take your user to your website.
You want to make sure that your DNS for your domain is set so that if your user types in something like cinnamonrollsinthedough.com instead of www.cinnamonrollsinthedough.com, it will take you to your website instead of a different page. You can follow the instructions here: how to edit dns records

Task 3: Choose a blog hosting service
For our last step we need to find a company that will house your blog on their servers. A lot of hosting services will also give you a domain for free (for the first year) as well as including a wordpress installer which will make your blog setup a lot easier.
After researching, I found the following options, all of which offer relatively the same kind of features:
- WordPress.com: $25/month (yeah, no thanks)
- Bluehost: $22/month (offers a cheaper plan comparable to Hostinger prices, but with less features)
- Dreampress: $20/month
- Hostinger: $3.99/month for the first year, $11.99/month after that
- Porkbun: $3.99/month for the first year, $20/month after that
- Digital Ocean: $11/month
- Vultr: $16/month
These prices are wild (tears). Personally I lean towards Hostinger simply because it is the least expensive. I have also used Digital Ocean in the past and it works pretty well, although it’s a bit more expensive. For now though: Hostinger + Porkbun = minimal tears. You can get Hostinger for 20% off using my link here!
Personally, I am manually hosting my website on a server that I own without going through a hosting service. This is definitely much more technically involved but it can save you money in the long run. You can visit my recommendations page to see the hardware that I’m using for this!

Quick Recap
Route options:
- blogging service like medium: total cost ($0.00)
- domain by porkbun, hosted by self route: total cost ($6.99 per year)
- domain by porkbun, hosted by hostinger route: total cost ($55 per year)
- create your own route: total cost (more than $55.00 per year)
Buying a domain and a hosting service is theoretically pretty easy, just pick the plan you like most and buy it. If you pick a hosting service that includes a wordpress installer then you should be in good hands and you won’t have to think too much about getting it installed. If this sounds overwhelming, it’s okay. I did it, therefore so can you. Just do one task at a time, and you will be able to figure it out along the way. And remember, if you run into any problems or have any questions you can leave them in the comments below or email me and I will get back to you ASAP!
Next week I’ll start talking about how to get wordpress set up once you’ve installed it so keep an eye out for that! Or better yet, subscribe to the newsletter and I will send out a notification once its out so you don’t have to remember! Plus get weekly recaps and sneak peeks of what I’ve been up to!
Leave a Reply